Gill Net
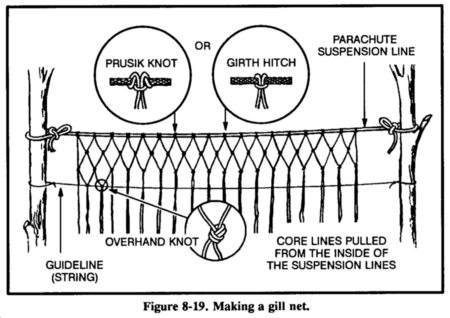
If a gill net is not available, you can make one using parachute suspension
line or similar material (Figure
8-19). Remove the core lines from the suspension line and tie the easing
between two trees. Attach several core lines to the easing by doubling them over
and tying them with prusik knots or girth hitches. The length of the desired net
and the size of the mesh determine the number of core lines used and the space
between them. Starting at one end of the easing, tie the second and the third
core lines together using an overhand knot. Then tie the fourth and fifth, sixth
and seventh, and so on, until you reach the last core line. You should now have
all core lines tied in pairs with a single core line hanging at each end. Start
the second row with the first core line, tie it to the second, the third to the
fourth, and so on.

To keep the rows even and to regulate the size of the mesh, tie a guideline
to the trees. Position the guideline on the opposite side of the net you are
working on. Move the guideline down after completing each row. The lines will
always hang in pairs and you always tie a cord from one pair to a cord from an
adjoining pair. Continue tying rows until the net is the desired width. Thread a
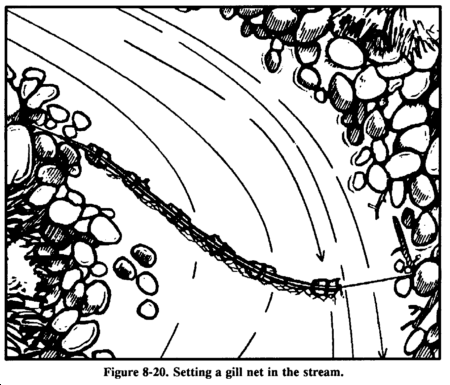
suspension line easing along the bottom of the net to strengthen it. Use the
gill net as shown in Figure 8-20.

| Updated:
12 January 2008 |
|
Born on 28 October 1999 |


